
Emerging Threats
Preparedness
Survival Basics – Part 2: Shelter Construction
"The most important factor in survival is neither intelligence nor strength but adaptability." — Charles Darwin
Thinking back to part 1 and our rule of 3's, the importance of establishing a shelter, in anything but the most temperate of climates, is unchallenged. Pay attention to the site selection considerations from part 1 particularly if you anticipate being there for more than one night. Careful site selection will help avoid exacerbating your situation e.g. you established your shelter on a flood plain next to the river. The water level has risen and overflowed into your site forcing you to move and rebuild, or worse still you have received an injury from a falling branch or rock and now have a fractured leg to contend with.
Other construction considerations will be:
- How much time is there to build the shelter?
- How big does it need to be (how many people are in your group)?
- Fire inside or outside – how cold is it?
- How long are we staying here?
- What tools or materials do we have available?
As with other survival scenarios, the more equipment we have with us the easier life will be. If we've slid off the road in a snow storm and are now stuck, our available materials (if we are suitably prepared) will be very different than if were left on the trail with a dented ego by a snorty equine "friend"!
Let's use these two unfortunate incidents as our examples and cover some of the many shelter options available to us. We'll assume that the vehicle rolled over in the accident but we were able to salvage our equipment bag from it.
Two of the items in our bag will help us rapidly establish a shelter – tarp and 550 cord. Assuming the vehicle presents no danger to us we could use it as a windbreak and fasten our tarp to its underside (now its upper surface) along its length. Bury the bottom side in the snow a short distance away from the side of the vehicle creating the impression that the stretched out tarp is leaning against the side of the upturned vehicle. Use snow to block up one of the open ends and enter/exit via the other. Put your insulation down on the snow (your camping roll mat or a thick layer of pine needles and brush) to avoid heat loss, build a sensible sized fire near the entrance to help warm the interior (being careful not to set fire to your tarp or ignite any fluids spills from the vehicle) and you'll be set.
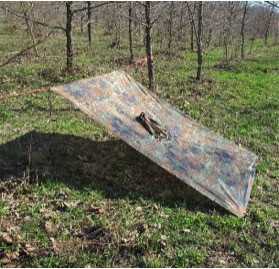
If the vehicle is beyond use, we can create a similar structure using two trees to fasten the upper portion of the tarp to. The bottom edge would be secured as with the vehicle and snow used to build a wall around the sides and front. Floor insulation would be the same.
If desired and or available, a horizontal support (ridgepole) can be placed between the trees to offer protection from falling debris.
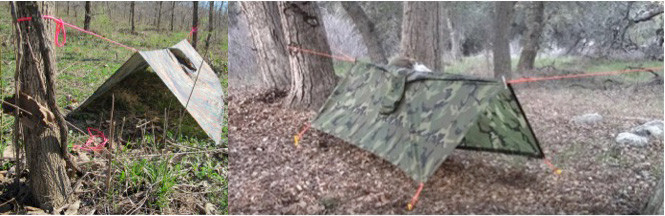
Another method is the one-person shelter. This can be constructed by fastening a center pole to a tree while leaving the other end on the ground. The tarp is draped over the pole and secured to the ground with "pegs" or snow. The same objective can be achieved using an "A frame" where no suitable trees are available (right).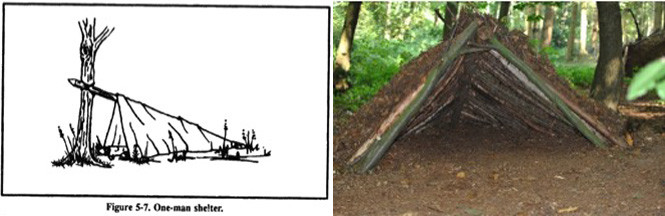
The above designs are extremely simple to erect with a tarp. Make sure you thoroughly insulate yourself from the ground remembering that if using natural materials, they will compress significantly when weight is applied.
Let's look at the equine scenario to see what we can produce using naturally occurring materials as were likely to have minimal equipment with us. All of these will have the same appearance as their tarp counterpart, will take more time and energy to construct but will serve you equally well should the need arise.
The lean starts with two uprights (trees or posts) to which you fix a horizontal "crossbar". This can be tied with cordage, a piece of bootlace, a belt etc. or by using two uprights with Y shaped ends in which the horizontal rests.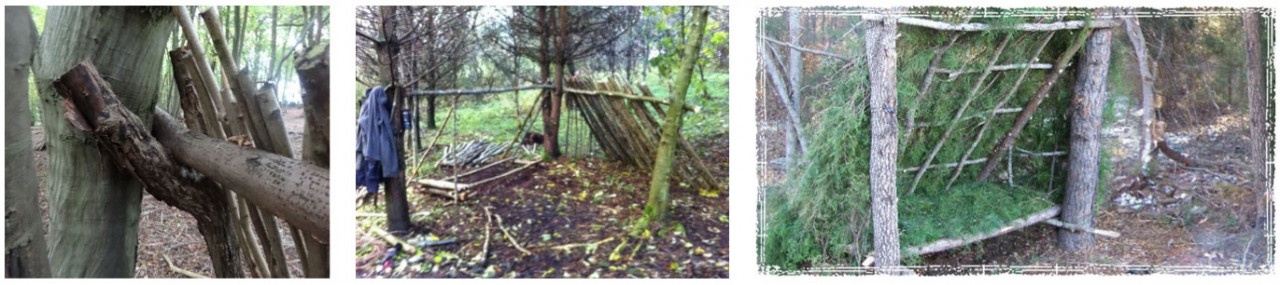
Onto that you lay your vertical sticks followed by "debris" (branches, twigs, leaves, moss, pine needles etc.) to create a thick, waterproof, heat retaining layer. Time and materials permitting you could consider making a raised platform (right above) to assist in preventing heat loss.
The tarp tent is recreated in natural form by lowering the center ridgepole of the leant to we've just made and adding an opposite side mirroring the first.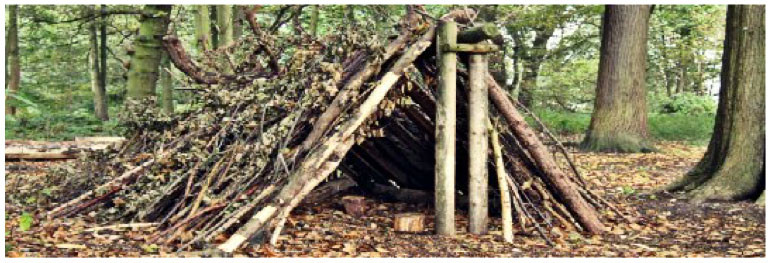
The one-person shelter looks the same. The only difference being the rear end of the ridgepole is touching the ground.
Another type of makeshift shelter for the forest in winter is the tree pit shelter. The pit is naturally occurring due to the branches sheltering the trunk from the snowfall. It's possible to get into the pit (ensure you can get out) and use it as a ready-made shelter. The branches provide top cover while the sides protect you from the wind. As with the other shelter types, ensure you put sufficient insulation in the bottom. It's also possible to wrap your tarp or place branches around the tree making a teepee like top below the branches. This will prevent any snow falling onto you from above particularly if you light a fire and it begins to melt.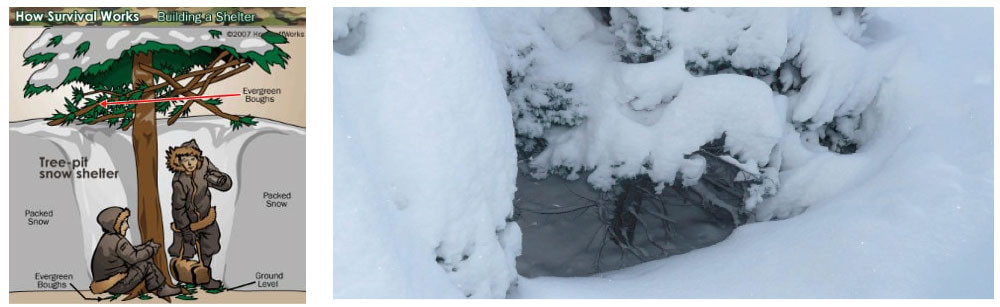
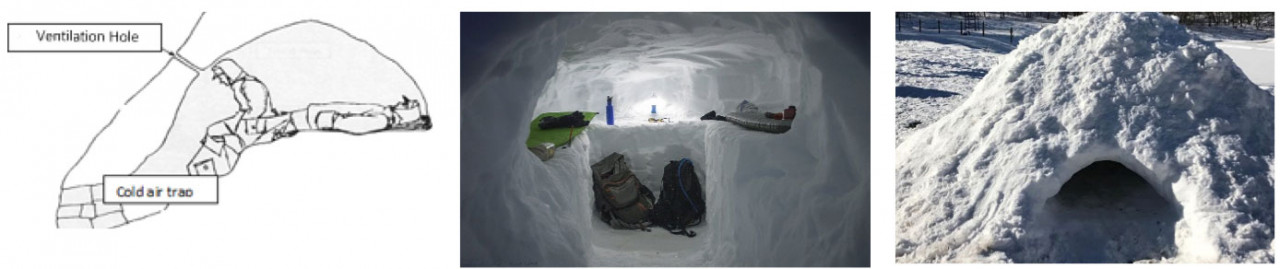
A snow cave is a longer term shelter option. It takes time to construct and requires a naturally occurring hill of snow to burrow into. A Quincy (right below) is built using the same methods as the snow cave with the exception of the requirement for us to pile the snow up into a mound and let it settle prior to burrowing in. start by digging a tunnel into the snow at a slight upward angle (down if you're coming out) then open it up into a cave. Be aware not to wear too much clothing and overheat while digging. This will also minimize the amount of clothing that gets damp from sweat or melting snow. Inside the cave the tunnel acts as a cold trench capturing the cold heavy air. A raised "bench" should be created as a sleeping platform and a ventilation hole made with a stick or pole etc. if you intend to cook inside. It's worth considering pushing a number of sticks approx. 18 inches to two feet long into the structure from the outside as you're hollowing out the interior. This prevents you from hollowing out too close to the surface and breaching your structure. A point to note is that as heat is generated inside the snow cave, there is potential for the roof to lower so don't panic when you wake and the place is a little smaller than when you went to sleep.
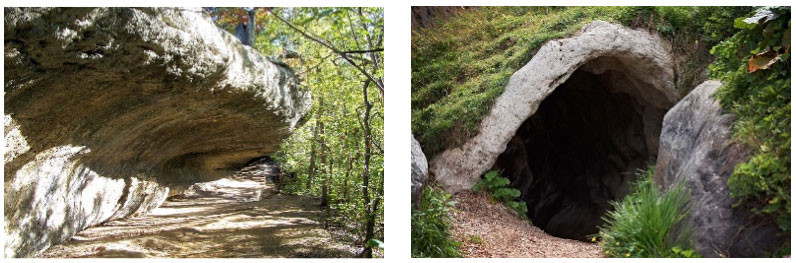
Don't forget to look for mother nature provided shelters prior to expending energy creating your own. Overhangs can provide shelter from inclement weather especially with the addition of a suitably sized heat reflecting wall. If presented with a large overhang, you could consider leaning sticks etc. against the wall reducing the size of the space to one more readily heated.
A cave can go one step further but think twice about caves with rodent nests and droppings from ground and wall hanging critters (bats). Be careful if there's water running within the cave as water levels can change drastically and without warning. Ensure adequate ventilation (just like in the snow cave) if you intend to light a fire.
As human beings we have minimum natural defenses against environmental extremes. When caught in such conditions we need to take our shelter with us or have the knowledge to quickly create one. The shelter clock ticks rapidly in extremes!
"Extraordinary people survive under the most terrible circumstances and they become more extraordinary because of it" - Sarah J. Mass